Whip Up Quick No-Bake Peanut Butter Pumpkin Cups in 30 Mins
As the leaves begin to turn and a crispness fills the air, our cravings naturally shift towards the comforting, warm flavors of fall. And what embodies autumn more perfectly than pumpkin? But who says you need hours in the kitchen to enjoy a decadent seasonal treat? Get ready to discover your new favorite fall dessert: these incredibly easy, utterly delicious, and surprisingly quick no-bake peanut butter pumpkin cups. In under 30 minutes of active prep time, you can have a batch of these creamy, dreamy delights chilling in your fridge, ready to impress friends, family, or simply satisfy your own sweet tooth.
Forget complicated baking techniques and extensive clean-up. This recipe is a game-changer for anyone seeking a hassle-free indulgence that doesn't compromise on flavor. Whether you're a seasoned dessert maker or just starting your culinary journey, these peanut butter pumpkin cups are designed for success. Prepare to wow your taste buds with a treat that's rich, perfectly spiced, and undeniably autumnal.
Why You'll Love These No-Bake Peanut Butter Pumpkin Cups
There's a reason why no-bake desserts hold a special place in our hearts – and our recipe books. They offer instant gratification with minimal effort, and these peanut butter pumpkin cups are no exception. Here’s why they’re destined to become a fall staple:
- Speed and Simplicity: The "no-bake" aspect means no oven preheating, no monitoring baking times, and significantly less cleanup. With just a few simple steps, you'll have these cups assembled in a flash, making them perfect for last-minute gatherings or a spontaneous treat.
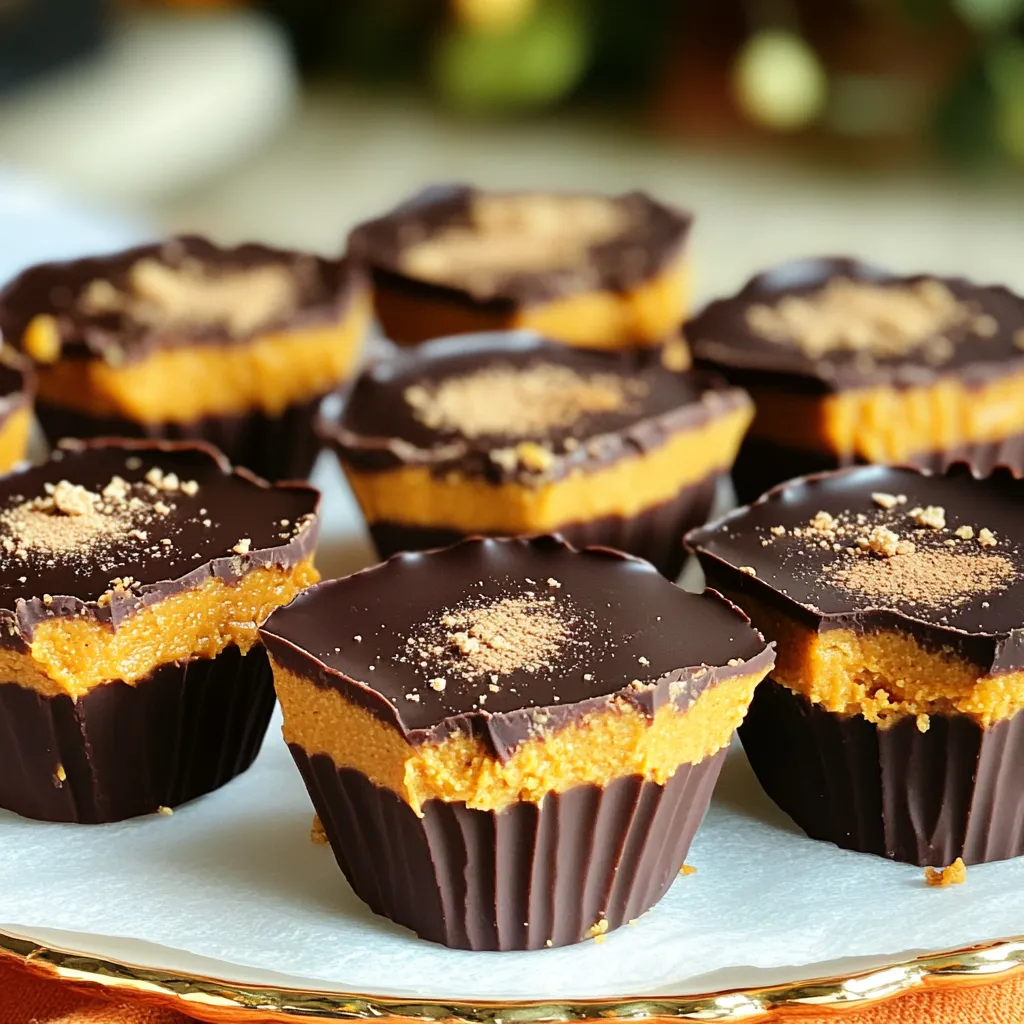
- Irresistible Flavor Combination: The classic pairing of rich, creamy peanut butter with the warm, earthy notes of pumpkin is a match made in culinary heaven. Add a hint of fall spices and a luxurious chocolate topping, and you've got a flavor profile that's both comforting and exciting.
- Texture Perfection: Beyond the creamy filling and smooth chocolate, the addition of graham cracker crumbs provides a delightful, subtle crunch that elevates the entire experience. It's a harmonious blend of soft, firm, and crisp in every bite.
- Versatile and Crowd-Pleasing: These cups are ideal for everything from cozy family evenings to festive holiday dessert tables. They're portion-controlled, easy to serve, and always a hit. Plus, their impressive appearance belies their simple preparation.
- Customizable: This recipe is incredibly flexible, allowing you to tailor it to your preferences or dietary needs. Want a different nut butter? Go for it! Prefer a darker or lighter chocolate? The choice is yours.
Indeed, the joy of these treats extends beyond their delicious taste; it's also in the sheer ease of creation. Imagine whipping up a gourmet-quality dessert without breaking a sweat or turning on your oven!
The Magic Behind the Ingredients: Simple & Flavorful
The beauty of these peanut butter pumpkin cups lies in their straightforward ingredient list, where each component plays a crucial role in delivering maximum flavor and perfect texture. You don't need exotic items; just a few pantry staples transform into something extraordinary. For a deeper dive into ingredient choices, check out our guide on Simple Ingredients for Creamy, Delicious Peanut Butter Pumpkin Cups.
- Creamy Peanut Butter: This forms the rich, smooth, and utterly satisfying base of your cups. Opt for a good quality creamy peanut butter that's not too oily or too dry. Natural peanut butter can work, but you might need to adjust consistency slightly. Its robust flavor is key to balancing the pumpkin.
- Canned Pumpkin Puree: The star of the show! Make sure you're using pure pumpkin puree, not pumpkin pie filling, which contains added sugars and spices. The puree adds authentic fall flavor, a beautiful orange hue, and contributes significantly to the creamy texture.
- Maple Syrup (or Honey): This natural sweetener not only adds sweetness but also a wonderful depth of flavor that complements both peanut butter and pumpkin. Maple syrup brings a distinctly autumnal note, while honey offers its own unique floral sweetness. Feel free to swap based on preference.
- Vanilla Extract: A kitchen essential, vanilla extract enhances and rounds out all the other flavors, adding a subtle warmth and aroma. Don't skip it!
- Pumpkin Spice: The quintessential fall blend! Store-bought pumpkin spice mixes typically include cinnamon, nutmeg, ginger, and cloves. If you don't have it, you can easily create your own blend. This spice blend infuses the cups with that unmistakable cozy, autumnal taste. A touch more cinnamon or ginger can be added if you desire a stronger spice kick.
- Sea Salt: A pinch of sea salt is critical for balancing the sweetness and intensifying the other flavors. It prevents the cups from being overly sweet and makes the pumpkin and peanut butter notes pop.
- Graham Cracker Crumbs: This unsung hero provides structure to the pumpkin peanut butter filling and introduces a delightful, subtle crunch. It helps the mixture hold its shape beautifully once chilled. If you're looking for a gluten-free option, use gluten-free graham cracker crumbs or finely crushed gluten-free biscuits.
- Dark Chocolate Chips: For the luxurious top layer. Dark chocolate offers a lovely contrast to the sweet filling and melts smoothly. You can use semi-sweet or even milk chocolate if preferred, but dark chocolate chips tend to set better and provide a more sophisticated flavor. For a dairy-free option, ensure you use dairy-free chocolate chips.
- Coconut Oil: A small amount of coconut oil is melted with the chocolate chips. This helps the chocolate become smooth, glossy, and, most importantly, allows it to set firmly and crack cleanly when bitten into, creating that satisfying candy bar texture.
Your Step-by-Step Guide to Perfect Peanut Butter Pumpkin Cups
Making these peanut butter pumpkin cups is genuinely straightforward. Follow these steps, and you’ll be enjoying your homemade treats in no time!
Step 1: Gather Your Ingredients and Prepare Your Muffin Tin
Before you begin, lay out all your ingredients. This practice, known as "mise en place," ensures a smooth and quick process. Line a standard 12-cup muffin tin with cupcake liners. Using liners is crucial as it makes removing the finished cups incredibly easy and keeps them looking neat.
Step 2: Craft the Creamy Pumpkin Peanut Butter Base
In a medium-sized mixing bowl, combine the creamy peanut butter, canned pumpkin puree, maple syrup (or honey), vanilla extract, pumpkin spice, and sea salt. Stir these ingredients thoroughly until the mixture is completely smooth and homogenous. You want a consistent, creamy texture without any streaks. Next, gently fold in the graham cracker crumbs. Add them gradually and mix until they are just incorporated. The crumbs are essential for giving the mixture body and helping it set. The final consistency should be thick enough to hold its shape but still soft and pliable.
Step 3: Form the Cups
Scoop the pumpkin peanut butter mixture into each of the prepared cupcake liners, filling them about three-quarters full. Use the back of a spoon or your fingers to gently press the mixture down, creating a relatively flat and even surface. This ensures a uniform base for your chocolate topping and a neat final appearance.
Step 4: Melt the Silky Chocolate Topping
In a microwave-safe bowl, combine your dark chocolate chips and coconut oil. Heat this mixture in the microwave using short bursts of 30 seconds at a time. After each burst, remove the bowl and stir the chocolate vigorously. Continue this process until the chocolate is completely melted and beautifully smooth, glossy, and free of any lumps. Be vigilant not to overheat the chocolate, as it can scorch and become grainy. Alternatively, you can use a double boiler method for a more controlled melting process.
Step 5: Assemble and Chill
Carefully pour the melted chocolate over each peanut butter pumpkin base, filling the liners almost to the top. Gently tap the muffin tin a few times on your counter. This helps to release any trapped air bubbles from the chocolate and ensures a smooth, even top layer. Once all cups are topped with chocolate, transfer the muffin tin to the refrigerator. This chilling step is absolutely crucial. Allow the cups to chill for at least one to two hours, or until the chocolate topping is completely firm and set. Patience here will be rewarded with perfectly structured cups!
Storage and Serving Suggestions
Once your No-Bake Peanut Butter Pumpkin Cups: Your Easy Fall Dessert are fully set, peel off the cupcake liners and store them in an airtight container in the refrigerator for up to a week. For a longer-lasting treat, these cups can also be stored in the freezer for up to two months. Simply thaw them slightly at room temperature for a few minutes before enjoying. For an extra touch, sprinkle a tiny pinch of flaky sea salt on top of the chocolate layer just after pouring it, before it sets, to further enhance the flavors. They make delightful gifts too, arranged in a decorative box!
Customization Ideas: Make Them Your Own
This recipe is incredibly adaptable, encouraging you to experiment and personalize your peanut butter pumpkin cups:
- Nut Butter Swaps: Not a fan of peanut butter or have an allergy? Almond butter, cashew butter, or even sunflower seed butter (for nut-free options) can be excellent substitutes. The flavor profile will shift, but the creamy texture remains.
- Spice Variations: If you love a stronger spice presence, add a pinch more cinnamon, ginger, or even a tiny amount of ground cloves to the pumpkin mixture. A dash of cardamom could also add an interesting twist.
- Topping Adventures: Before the chocolate sets, sprinkle with chopped nuts (pecans, walnuts), mini chocolate chips, sprinkles, or even a drizzle of white chocolate for a beautiful contrast.
- Dietary Adaptations: For a lower-sugar version, use a sugar-free maple syrup alternative. For gluten-free needs, ensure your graham cracker crumbs are certified gluten-free. As mentioned, dairy-free chocolate chips are readily available for vegan or dairy-intolerant diets.
There you have it – a perfectly comprehensive guide to creating these delightful no-bake peanut butter pumpkin cups. This recipe proves that you don't need to be a gourmet chef or spend hours in the kitchen to create a truly memorable and delicious fall dessert. With simple ingredients, minimal fuss, and a quick chilling time, you can whip up a batch of these creamy, spiced, chocolate-topped treats that are guaranteed to bring smiles and satisfy any autumn craving. So go ahead, gather your ingredients, enjoy the process, and get ready to indulge in the ultimate quick fall indulgence!
