No-Bake Peanut Butter Pumpkin Cups: Your Easy Fall Dessert
As the leaves begin to turn and the air grows crisp, there's an undeniable craving for the comforting flavors of autumn. While pumpkin spice lattes often steal the show, nothing quite beats a homemade sweet treat that captures the essence of the season without the fuss. Enter the delightful world of no-bake peanut butter pumpkin cups – a truly effortless and incredibly satisfying dessert that promises creamy texture, rich flavor, and a touch of fall magic in every bite. Whether you're a seasoned baker or just dipping your toes into the kitchen, this simple recipe is designed to impress with minimal effort, making it your go-to for impromptu gatherings or cozy nights in.Why You'll Love These No-Bake Peanut Butter Pumpkin Cups
There’s a reason these peanut butter pumpkin cups are gaining such popularity. Their appeal lies not just in their incredible taste, but in a host of practical benefits that make them a dessert champion:- Effortless Preparation: As the name suggests, there's no oven required! This makes them perfect for warmer fall days when you don't want to heat up your kitchen, or when you simply crave a quick dessert. You can truly whip up quick no-bake peanut butter pumpkin cups in 30 mins of active preparation time, excluding chilling.
- Simple Ingredients: You won't need a pantry full of exotic items. Most of the components are likely staples you already have, making these both budget-friendly and accessible.
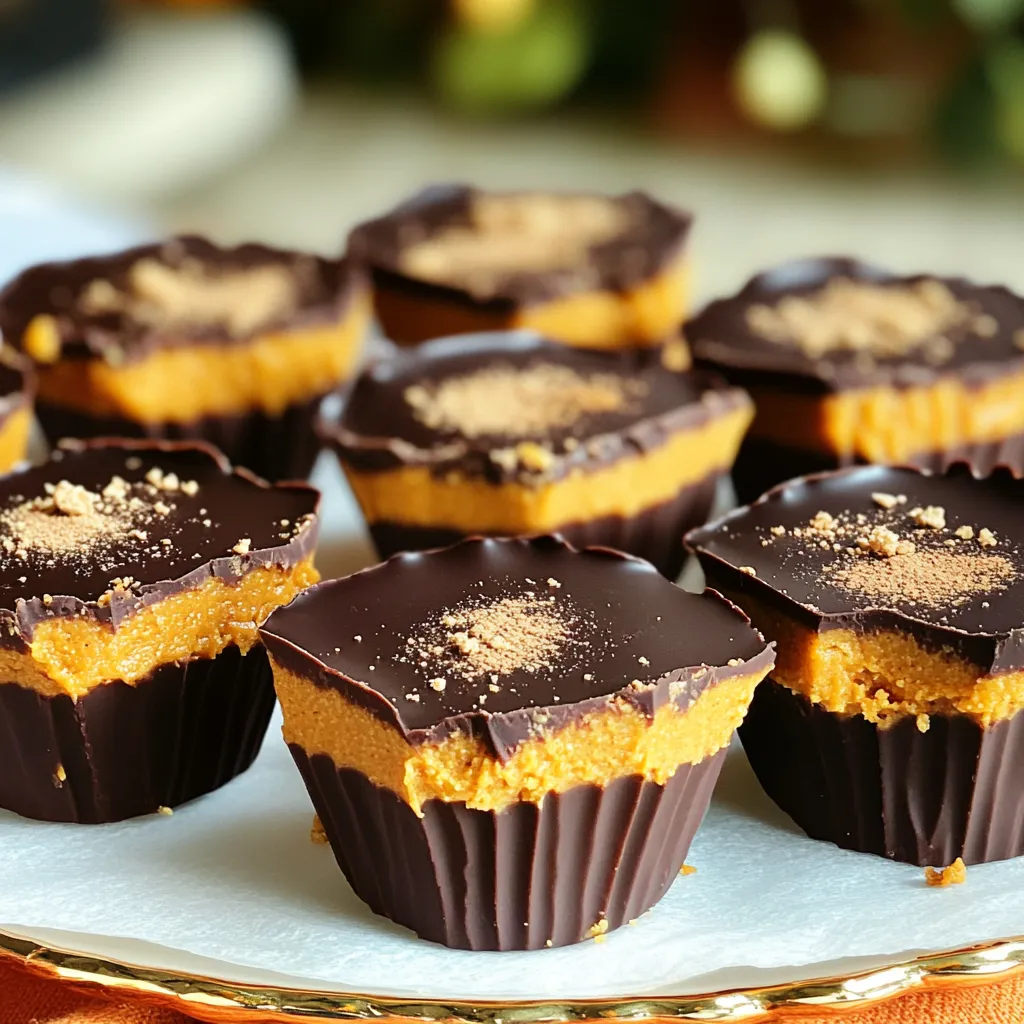
- Irresistibly Delicious: The combination of creamy peanut butter, earthy pumpkin, warm spices, and a decadent chocolate shell is a flavor symphony that's hard to resist. It’s a sophisticated twist on the classic peanut butter cup, elevated for the pumpkin season.
- Make-Ahead Friendly: These cups need to chill, making them an ideal make-ahead dessert. Prepare them hours, or even days, in advance and simply pull them out when you're ready to serve.
- Crowd-Pleaser: From kids to adults, the universal appeal of peanut butter and chocolate, combined with the seasonal charm of pumpkin, makes these a guaranteed hit at any fall gathering, Halloween party, or Thanksgiving spread.
- Versatile & Customizable: This recipe offers fantastic flexibility for dietary needs and flavor preferences, allowing you to truly make them your own.
Unlocking the Flavor: Key Ingredients & Customizations
The beauty of these no-bake peanut butter pumpkin cups lies in their straightforward ingredient list, where each component plays a vital role in creating the perfect balance of flavor and texture. Understanding these roles also opens the door to exciting customizations. For a detailed exploration of what makes these treats so special, consider delving into Simple Ingredients for Creamy, Delicious Peanut Butter Pumpkin Cups.The Creamy Peanut Butter Pumpkin Base:
This is where the magic truly begins, creating a rich, spiced, and utterly satisfying core for your cups.
- Creamy Peanut Butter: The foundation of our cups, providing a rich, nutty flavor and a wonderfully smooth texture. I highly recommend using a smooth, processed peanut butter (like Jif or Skippy) for consistent results, as natural peanut butter can sometimes separate and make the mixture too oily or crumbly. If you prefer natural, ensure it’s very well-stirred. Feel free to experiment with other nut butters like almond, cashew, or even sunflower seed butter for a nut-free alternative.
- Canned Pumpkin Puree: Crucial for that authentic fall taste and a lovely creamy texture. Important: Ensure you grab 100% pure pumpkin puree, not pumpkin pie filling, which is already sweetened and spiced. Pumpkin puree also adds a subtle earthy note and a dose of vitamins.
- Maple Syrup (or Honey): Our primary sweetener, offering a depth of flavor that complements pumpkin beautifully. Maple syrup also helps achieve that perfect pliable texture. You can easily swap it for honey for a slightly different flavor profile or use a sugar-free alternative like erythritol syrup or a few drops of stevia for a low-sugar option, though these might slightly alter the texture.
- Vanilla Extract: A universal flavor enhancer, vanilla brings out the best in both the peanut butter and pumpkin, adding a warm, aromatic note. Don't skip it!
- Pumpkin Spice: The quintessential fall flavor! This blend typically includes cinnamon, nutmeg, ginger, and cloves, delivering that cozy, aromatic warmth. If you don't have a pre-made blend, you can create your own by mixing individual spices to taste (e.g., 2 parts cinnamon, 1 part ginger, 1 part nutmeg, 0.5 part cloves).
- Sea Salt: A pinch of sea salt is critical for balancing the sweetness and enhancing all the other flavors. It truly makes the ingredients sing.
- Graham Cracker Crumbs: These are a game-changer! Graham cracker crumbs not only add a delightful subtle crunch but also act as a binder, helping the peanut butter pumpkin mixture hold its shape and preventing it from being too sticky. For gluten-free versions, simply use gluten-free graham cracker crumbs or finely crushed digestive biscuits. For a healthier alternative, finely ground oats or almond flour can work, though they might alter the texture slightly.
The Decadent Chocolate Layer:
A glossy, snappy chocolate shell is the crowning glory of these irresistible treats.
- Dark Chocolate Chips: I recommend dark chocolate chips (60-70% cacao) for a beautiful contrast to the sweet filling, but semi-sweet or even milk chocolate chips work if you prefer a sweeter profile. For a dairy-free or vegan option, ensure you use dairy-free chocolate chips. Quality chocolate makes a difference here, so choose your favorite brand!
- Coconut Oil: This is the secret to a smooth, pourable chocolate that sets beautifully with a satisfying snap. Coconut oil melts with the chocolate and helps it re-solidify into a firm, glossy coating. If you don't have coconut oil, a tiny bit of butter or a neutral oil can work in a pinch, though coconut oil is ideal for its setting properties and adds a subtle tropical hint.
Crafting Your Perfect Peanut Butter Pumpkin Cups: A Step-by-Step Guide
Making these no-bake peanut butter pumpkin cups is a straightforward process, broken down into two main stages: preparing the base and creating the chocolate topping. Precision and patience, especially during the chilling phase, are key to success.Step 1: Prepare Your Peanut Butter Pumpkin Mixture
- Gather Your Ingredients: Before you begin, measure out all your peanut butter, pumpkin puree, maple syrup, vanilla extract, pumpkin spice, sea salt, and graham cracker crumbs. This ensures a smooth and efficient process.
- Combine Wet Ingredients: In a medium-sized mixing bowl, add the creamy peanut butter, canned pumpkin puree, and maple syrup. Stir these together thoroughly until they are well combined and smooth.
- Add Flavor Enhancers: Incorporate the vanilla extract, pumpkin spice, and sea salt into the mixture. Continue stirring until all the spices are evenly distributed and the mixture is consistently smooth and aromatic.
- Fold in Graham Cracker Crumbs: This is a crucial step for texture and structure. Gently fold in the graham cracker crumbs. Mix until just combined, being careful not to overmix. The crumbs will thicken the mixture and help it hold together better, giving it a delightful "no-bake crust" quality. The mixture should be thick enough to scoop and hold its shape. If it feels too wet, you can add a touch more graham cracker crumbs (a tablespoon at a time) until it reaches the desired consistency.
Step 2: Form the Cups
- Line Muffin Tin: Line a standard 12-cup muffin tin with paper cupcake liners. This makes for easy removal and serving later.
- Scoop & Press: Using a spoon or a small cookie scoop, portion the peanut butter pumpkin mixture into each liner. Fill them approximately three-quarters full. Gently press the mixture down with the back of a spoon or your fingers to create a flat, even surface. This ensures a uniform base for your chocolate layer and helps the cups hold their shape.
Step 3: Create the Chocolate Topping
- Melt Chocolate: In a microwave-safe bowl, combine your dark chocolate chips and coconut oil. Microwave the mixture in short bursts – 30 seconds at a time – stirring thoroughly between each burst. Continue until the chocolate is completely melted and smooth. Be careful not to overheat, as chocolate can scorch easily. Alternatively, you can use a double boiler method for a more controlled melt.
- Pour Chocolate Layer: Carefully spoon or pour the melted chocolate mixture over each peanut butter pumpkin base. Fill the liners to the top, ensuring the pumpkin mixture is fully covered.
- Smooth & Settle: Gently tap the muffin tin on your counter a few times. This helps to release any trapped air bubbles and creates a smooth, even chocolate surface.
Step 4: Chill to Perfection
- Refrigerate: Place the muffin tin into the refrigerator. Allow the cups to chill for at least 1 to 2 hours, or until the chocolate layer is completely set and firm to the touch. This step is essential for the cups to hold their shape and develop that satisfying chocolate snap.
- Serve & Enjoy: Once fully set, remove the cups from the refrigerator. Carefully peel off the cupcake liners. Your homemade no-bake peanut butter pumpkin cups are now ready to be enjoyed!
Beyond the Basics: Advanced Tips & Dietary Adaptations
While the basic recipe for these peanut butter pumpkin cups is wonderfully simple, there are numerous ways to elevate them further or tailor them to specific needs.For the Adventurous Cook:
- Spice it Up: For an extra kick, add a tiny pinch of cayenne pepper to the pumpkin mixture, or a dash of black pepper for a sophisticated warmth. A sprinkle of flaky sea salt on top of the melted chocolate before it sets adds a gourmet touch and enhances the flavor contrast.
- Textural Contrast: Sprinkle a few toasted chopped pecans, walnuts, or pumpkin seeds on top of the chocolate before it sets for added crunch and visual appeal.
- Flavor Infusions: A tiny bit of orange zest in the pumpkin mixture can brighten the flavors beautifully. Consider a drop of almond extract alongside vanilla for a different aromatic profile.
- Miniature Delights: Use a mini muffin tin for bite-sized treats, perfect for parties or portion control.
Dietary Adaptations:
- Vegan/Dairy-Free: Ensure your chocolate chips are certified dairy-free, and use maple syrup instead of honey. This recipe is naturally dairy-free if these substitutions are made.
- Gluten-Free: The primary ingredient to watch is graham cracker crumbs. Simply swap them for certified gluten-free graham cracker crumbs, or use finely ground gluten-free oat flour.
- Lower Sugar: Replace maple syrup with a sugar-free liquid sweetener like sugar-free maple syrup, erythritol syrup, or a few drops of stevia. Adjust to your taste preference. Opt for a darker chocolate with lower sugar content.
- Nut-Free: Swap peanut butter for sunflower seed butter (like SunButter) and ensure your chocolate chips are allergen-friendly.
Storage & Shelf Life:
- Refrigeration: Store leftover peanut butter pumpkin cups in an airtight container in the refrigerator for up to 5-7 days.
- Freezing: For longer storage, these cups freeze exceptionally well! Place them in an airtight container or freezer bag, separated by parchment paper, for up to 2-3 months. Thaw in the refrigerator for an hour or two before serving, or enjoy them frozen for a firmer, almost ice-cream-like treat.
